Mini Copper Bike Bell: Clear Chime for Clean Cockpits

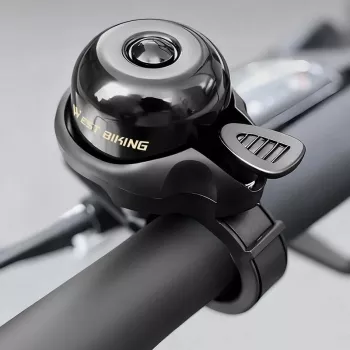
Mini Copper Bike Bell with a Clear Chime for In-Handlebar Setups
A compact copper bell can add a crisp, polite alert without cluttering a handlebar cockpit. Whether you ride shared paths, weave through campus walkways, or commute on neighborhood streets, a mini bell gives you a fast, friendly way to signal without relying on shouting. Below are practical notes on fit (0.75–1.25 in bars), sound characteristics, mounting choices for in-handlebar layouts, and simple care tips to keep the chime bright over time.
What a mini copper bell adds to everyday riding
A good bell is a small upgrade that pays off daily. The main benefit is an unmistakable tone—often easier for pedestrians and other riders to notice than a soft clicker, especially when traffic noise, wind, and headphones are in the mix.
- Produces a bright, attention-getting chime that’s easier to distinguish than a soft clicker in busy areas
- Smaller footprint helps keep grips, lights, and computers uncluttered
- Copper finish offers a classic look that pairs well with retro, city, and commuter builds
- Simple, quick signaling for shared paths, campus riding, and neighborhood streets
For broader riding safety guidance, see the official bicycle safety recommendations from NHTSA and CPSC.
Quick specs and fit checklist
Before ordering, confirm your handlebar diameter where the clamp will sit. Many bars taper near the grips, and accessories can eat up more space than expected.
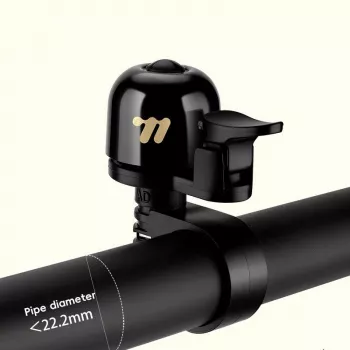
- Handlebar diameter compatibility: 0.75–1.25 in (check before ordering)
- Best for: commuters, casual riders, and anyone wanting a clean cockpit with a clear alert
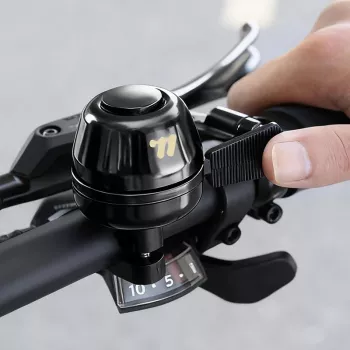
- Placement: near thumb reach so the bell is usable without changing grip
- Clearance: ensure the striker doesn’t hit brake levers, shifters, or accessory mounts
Mini Copper Bell overview
| Detail | What to check |
|---|---|
| Handlebar fit range | 0.75–1.25 in diameter |
| Sound goal | Clear, crisp chime that cuts through ambient noise |
| Mounting location | Within easy thumb reach; avoid lever interference |
| Typical use cases | Shared paths, commuting, group rides, campus |
| Care needs | Occasional wipe-down; keep hardware snug |
Getting the cleanest sound: placement and technique
Small bells can sound surprisingly “big” when they’re mounted on a firm section of the bar and allowed to vibrate cleanly. If the chime seems dull, it’s usually a setup issue (contact points, clamp tension, or nearby rattles) rather than the bell itself.
- Mount near the dominant hand so the striker can be actuated smoothly
- Avoid placing directly against soft bar tape edges that can dampen vibration
- Leave a small gap from adjacent clamps (lights/computers) to reduce rattles
- Use a consistent, quick flick rather than repeated half-presses to maintain a bright ring
- If the chime sounds muted, re-check clamp tightness and contact points around the bell
A helpful habit on shared paths is to ring earlier than you think you need—giving people time to react without feeling startled—then slow slightly as you pass.
In-handlebar and compact cockpit compatibility
In-handlebar accessories and minimalist cockpits look clean, but they can limit room for traditional bells and horns. A mini copper bell works well because it keeps the audible alert external, compact, and easy to access.
- Works well with bars that already host in-handlebar accessories by keeping the audible alert external and compact
- Plan the layout: bell first, then light/computer mounts, to preserve thumb access
- For narrow flat bars, position closer to the stem to reduce crowding at the grip area
- For drop bars, place on the tops near the hood area if clamp fit and reach are comfortable
If you’re running a light, computer mount, and remote controls, prioritize “thumb safety”: you should be able to ring the bell without twisting your wrist into the lever area or loosening your hold on the bar.
Installation and safety checks
Installation is quick, but a few checks prevent common annoyances like rotation, buzzing, or lever interference.
- Confirm handlebar diameter at the mounting spot (some bars taper near the grips)
- Tighten the clamp to prevent rotation, but avoid over-tightening on lightweight bars
- Spin and bounce test: lift the front wheel slightly and tap down to listen for rattles
- Re-check after the first ride—hardware can settle and may need a small snug-up
- Keep the bell usable: if it’s hard to reach, reposition rather than forcing awkward hand movements
If you ride in dense pedestrian areas, pair your bell use with predictable line choice and reduced speed. A bell is a communication tool—not a right-of-way device.
Care and longevity for a bright copper look
Pairing with other upgrades for a smoother ride
For helmet and injury-prevention guidance, the CDC bicycle safety page is a solid reference.
Product options
- Mini Copper Bike Bell with Clear Chime for 0.75–1.25 in Handlebars: compact profile and a bright alert that’s easy to use without shifting your grip.
- Ultralight Non-Slip Aluminum Bike Pedals with Sealed Bearings: a solid match for commuting and casual riding when you want confident foot placement in wet or dusty conditions.
FAQ
Will this bell fit my handlebar?
It’s designed for 0.75–1.25 in handlebar diameters. Measure the bar where the clamp will sit (some bars taper), and make sure there’s clearance from brake levers, shifters, and mounts.
How can the chime be kept loud and clear?
Mount it on a firm section of the bar and keep the clamp snug so it can resonate properly. Avoid contact with other accessories, and clear any grit around the striker so the mechanism moves freely.
Is a bike bell required on shared paths?
Rules vary by location and trail system. Many areas recommend or require an audible warning device, so it’s best to check local regulations and posted signage where you ride.







Leave a comment